Processing returns through ReturnZap
Return process steps
A return typically follows a certain order within ReturnZap.
- Customer requests a return through the return portal
- The return request is either automatically approved, or manually reviewed and approved
- The customer sends their return back to the merchant
- The merchant inspects the return, identifying if it was received in full, in good condition, and if items can be restocked
- The merchant processes the return, so the customer receives their resolution - either a refund, store credit, or an exchange
There are several steps involved in inspecting and processing a return. This article details how this can be done in ReturnZap.
Opening a return for processing
The first step to process a return in ReturnZap is to navigate to it. From the Returns page, click anywhere on the line for the return which you wish to process. This will open the Return Detail Page.
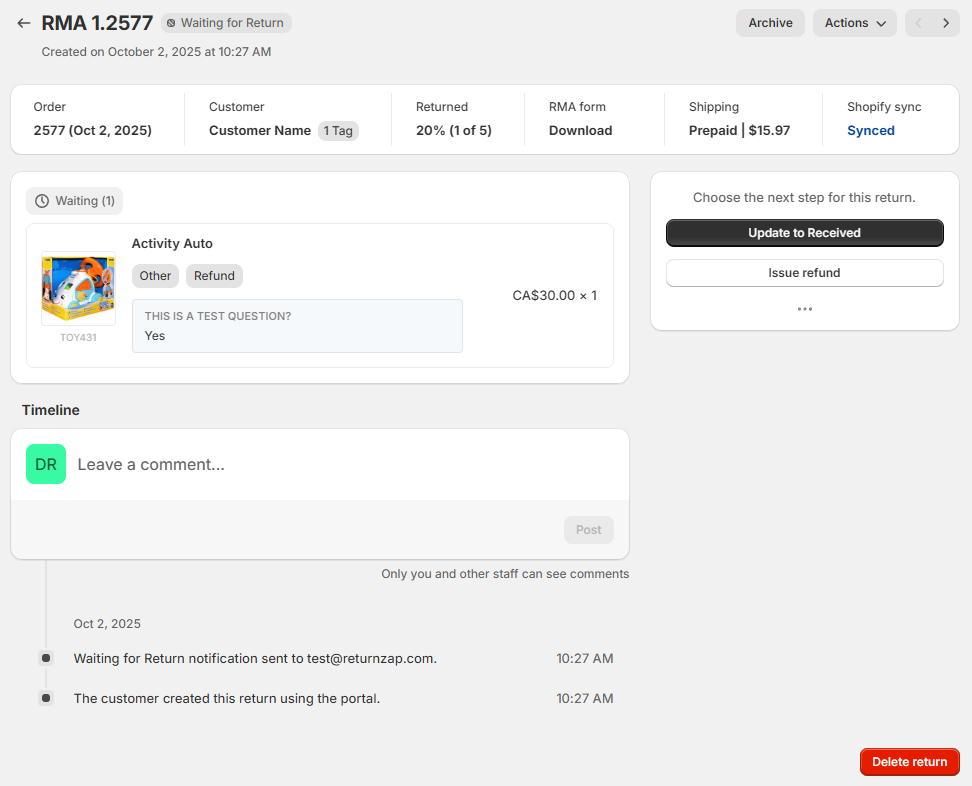
ReturnZap will always suggest actions on the right hand sidebar of the Return Detail Page.
Receiving a return
The first step to process a return is to mark it as received. To mark a return as received, simply click the Update to Received action on the right hand side of the page.
Once clicked, the return will enter into Receiving mode. This will allow you to select the quantity of items which were received back at your warehouse.
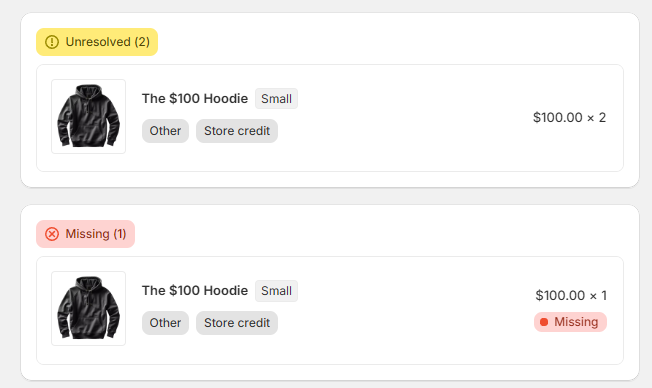
Items which are not received in ReturnZap will have their status updated to Missing. Missing items will not be included in any refunds, store credit, or exchanges which are completed through ReturnZap.
Once you click to confirm Update to Received, the return's status will update to Received. This can optionally trigger an email notification to the customer.
Email notifications for each return status can be enabled and configured in ReturnZap Settings > Email Notifications
Restocking a return
Returns can be restocked to Shopify inventory through ReturnZap at multiple steps of the return process.
Commonly this is done at the same time a return is marked as Received. ReturnZap will display a checkbox (defaulting to unchecked) which will allow you to restock the item as part of the receiving process.
If you have multiple inventory locations in Shopify you will see a dropdown prompting you to select the item for restocking. If you have only a single inventory location, it will be selected by default and no dropdown will be present.

Restocking can also be skipped during the Receiving process. Items can be restocked at a later point by using the Actions menu at the top of the return page and clicking Restock.
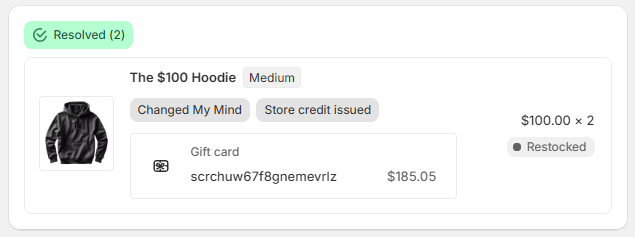
Once an item is restocked, a restock status will display within ReturnZap

Resolving returns
ReturnZap will display an unresolved status for return items which have not yet been processed. Unresolved means that the customer has not yet received a refund, store credit, or an exchange for the requested item.
Each item within a return will display a resolved status. The return itself will also display an overall resolved status, which will be visible on the Return Detail page and also on the Returns page.

Issuing refunds through ReturnZap
If you are processing a return which contains one or more items for refund, the ReturnZap sidebar will prompt to Issue Refund.

Clicking this button will bring up the refund calculation and confirmation step. You will be able to view the calculated refund, see any fees which apply, and make changes if necessary.

The optional checkbox Send Shopify refund notification controls whether the default Shopify email notification will be sent to the customer as soon as a refund is triggered.
Once a refund is issued, the item's status will update to resolved.

Issuing store credit through ReturnZap
If you are processing a return which contains one or more items for refund, the ReturnZap sidebar will prompt to Issue Store Credit.
The process works in exactly the same was as refunds. The store credit sidebar will calculate the amount of store credit due. This can include optional store credit bonus credit, if enabled.

Once store credit is issued, the items will update to the resolved status. In the case of store credit issued to a gift card or to a discount code, ReturnZap will display the corresponding code with a link to Shopify.
In the case of store credit issued to Shopify account credit, no code is generated but ReturnZap will still display the item as resolved.
Processing exchanges through ReturnZap
If you are processing a return which contains one or more items for exchange, the ReturnZap sidebar will prompt to Release Exchanges.
Releasing an exchange converts the exchange from a pending status to a ready to ship status. It is the final step before an exchange can be fulfilled by your warehouse in order to send the customer their replacement item.
Exchange items which have not yet been released will display in a pending status on the return detail page.

The sidebar will display an alert if there is an unpaid balance on the order, for example in the event of an unequal exchange where the customer must pay the difference.

Once released, items will update to a "Released exchanges" status.

Resolving items manually
Items can also be marked as Resolved Manually in ReturnZap. Manually resolving an item will mark it as resolved in ReturnZap but will not take any action in Shopify.
This can be used for cases where a return is handled outside of ReturnZap, for example directly from the order page. Marking these returns as resolved manually in ReturnZap keeps data accurate and ensures that returns are not left out of sync between ReturnZap and Shopify.
Example return processing video
This video walks through the steps to process a single return which contains items for refund, exchange, and store credit.