
Rejecting return items on receipt
Rejecting Items When Receiving a Return
Sometimes a return arrives and something is wrong with it. An item comes back damaged, shows signs of use, is missing parts, or is not the item the customer was supposed to send. ReturnZap lets you reject individual items as you receive a return, so you can record exactly what came back in unacceptable condition and keep those units out of your sellable inventory.
Item rejections are recorded per unit. You can accept some items on a return and reject others, and you can even accept some units of an item and reject the rest.
Note: Rejecting an item on receipt is different from rejecting a return request. Rejecting a return request happens before anything ships back, when a return is awaiting approval, and declines the whole request. Item rejections happen at receiving, after the package arrives, and apply to individual units.
Rejecting items while receiving a return
When you move a return to your Received stage, ReturnZap asks you to confirm what actually arrived. Select the items you received, leave missing items unselected, and add rejections for items received with an issue.
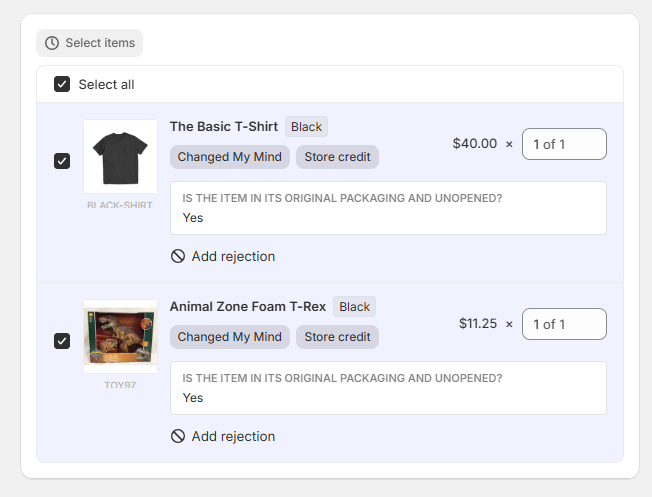
To reject an item:
- Open the return and start moving it to your Received stage.
- Keep the item selected. A rejected item is still a received item, you have it in hand. Only leave items unselected if they never arrived, unselected items are marked as missing.
- Click Add rejection under the item.
- Choose a rejection reason from the dropdown.
- If the item group contains more than one unit, use the quantity selector to set how many units are rejected. Units without a rejection are received as normal.
- To record different problems on different units, click Add rejection reason to add another reason with its own quantity.
- Complete the stage change as usual.
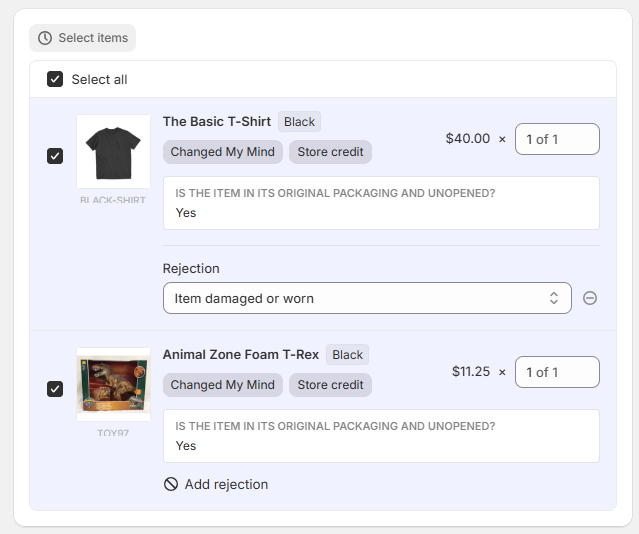
Every rejection needs a reason before you can submit, and the number of rejected units cannot exceed the number of units you are receiving. If you no longer need a rejection line, remove it with the minus button next to it.
Rejection reasons
You can choose from the following reasons:
- Not in original condition
- Item damaged or worn
- Wrong item returned
- Missing components or accessories
- Signs of use or wear
- Return window expired
- Warehouse rejected
- Other
The reason is stored on the item and shown on the RMA page and in the return timeline, so anyone looking at the return later can see why a unit was rejected.
Correcting a receiving status after the fact
If an item was received, rejected, or marked missing by mistake, you can correct it at any time before the item is resolved.
- On the RMA page, open the ... menu on the item.
- Choose Set received status.
- Pick how many units you are updating, then choose Received or Missing.
- If you choose Received, you can add rejections in the same way as during receiving. Leave the rejections empty to record the units as received in good condition.
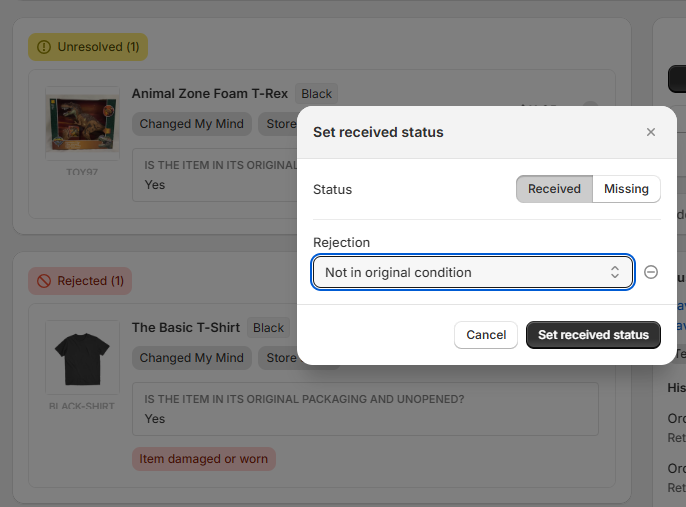
Changing a rejected unit back to received in good condition reopens it, so it goes back to behaving like any other received item.
What happens when an item is rejected
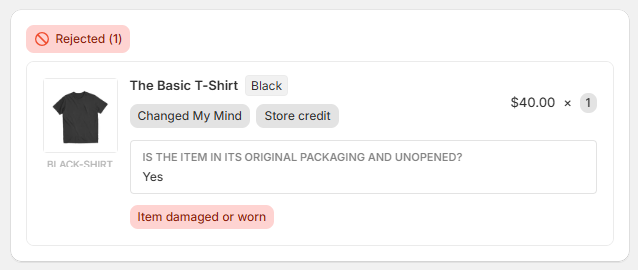
It appears in the Rejected section of the RMA page. Rejected items are grouped by rejection reason in their own card, so it is always clear which units were accepted and which were not.
It is not restocked. Rejected units are excluded from restocking, both in the ReturnZap admin and at the server level, so a rejected unit is never added back to your sellable inventory in Shopify. If you restock a batch that includes rejected items, the rest of the batch restocks normally and the rejected units are skipped.
Exchange replacements are not released for it. If the rejected item was part of an exchange, the replacement for that unit is excluded when the exchange is released, so you do not ship a replacement for an item you did not accept.
No refund or credit is issued for it automatically. A rejection is a final outcome for that unit, and a return can be fully resolved with rejected items standing. If you decide to compensate the customer anyway, you can still issue a refund or store credit for a rejected item manually, and the item will show that resolution.
The return timeline records it. Rejections and any later corrections are logged on the return, including the reason, so you have a full history of what was received and in what condition.
Customers are not notified automatically. Item rejections are internal to your team. Nothing changes in the customer's return portal view, and no automatic email is sent, so you stay in control of how and when you communicate the outcome to your customer.
Frequently asked questions
Can I reject only some units of an item? Yes. Rejections are per unit. If a customer returned three of the same item and one came back worn, receive all three and add a rejection with a quantity of one.
Do I need to reject items to handle a missing item? No. Items that never arrived should be left unselected at receiving, which marks them as missing. Rejection is for items you physically received but cannot accept.
Can the customer see the rejection reason? No. Rejection reasons are internal and are not shown in the customer portal or in notifications.
What is the Warehouse rejected reason for? Use it when a third party warehouse or returns processor inspected the package and rejected the item on your behalf.